You can edit an existing Midjourney image with written instructions in the Edit Model or by selecting a region in the Editor. This example changes a jacket, removes a cup and replaces a portrait’s background. The comparisons also show changes that were not requested.
The starting image and settings
The starting image is a portrait of a woman at a wooden table. A navy jacket fills much of the frame, a red cup sits at the right edge, and the background is dark and blurred. These give us three distinct elements to examine.
The metadata of all four files records V8.2, a 4:5 aspect ratio, Raw mode and the same Personalization profile. The three edited files also include --edit and an image reference. Your own profile can affect the look, so copying the description may not reproduce the same aesthetic.
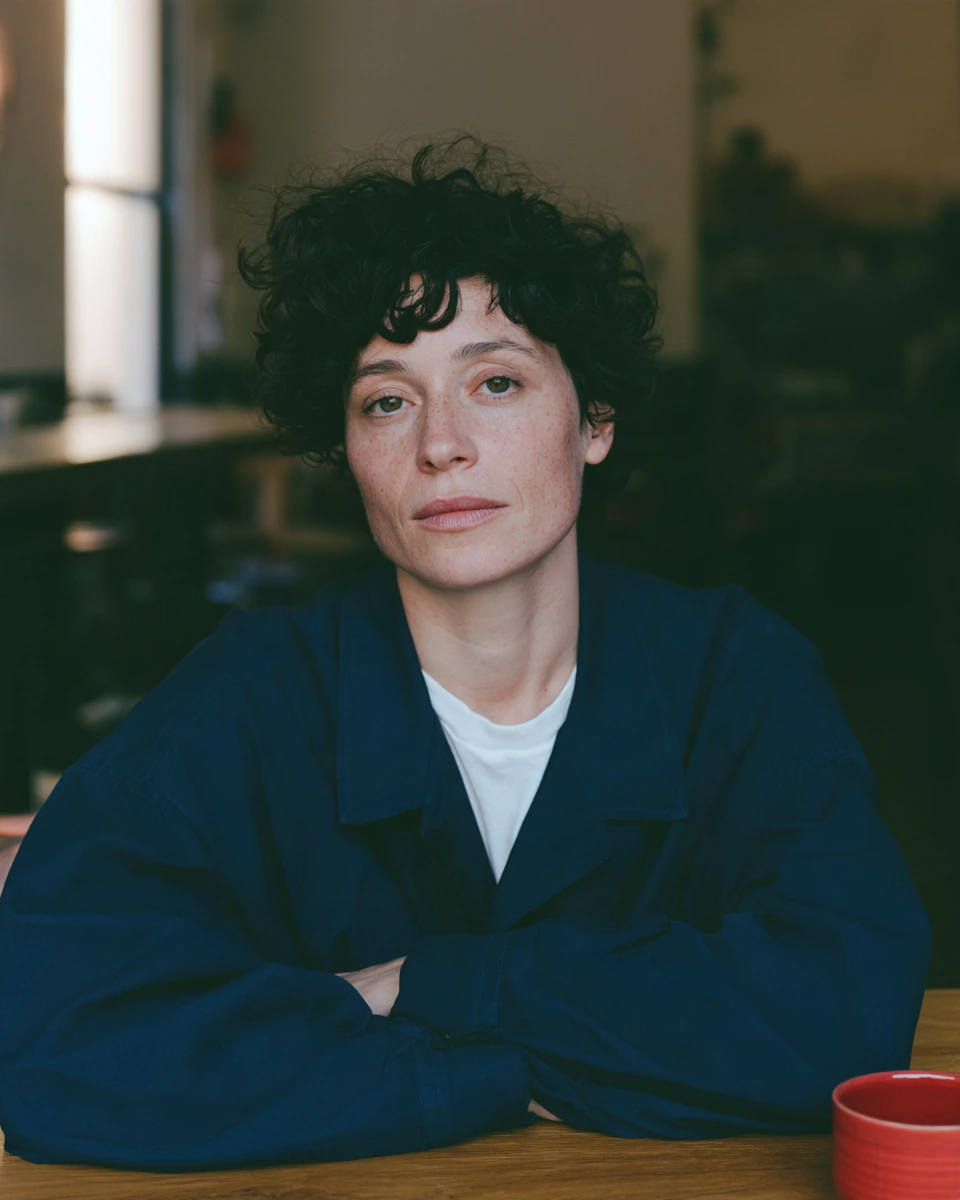
The starting image used this description:
editorial photograph of an adult woman with short dark curly hair, wearing a plain navy blue jacket over a white shirt, seated at a wooden cafe table, a red ceramic cup on the right side of the table, quiet cafe interior, soft window light from the left, waist-up composition, natural skin textureThe parameters were --ar 4:5 --raw --v 8.2, together with a Personalization profile. See the Midjourney glossary for explanations of the settings.
How to change clothing in Midjourney
The first instruction targets the jacket:
Replace the navy jacket with an ochre linen jacket. Keep the white shirt, the seated pose and the original lighting.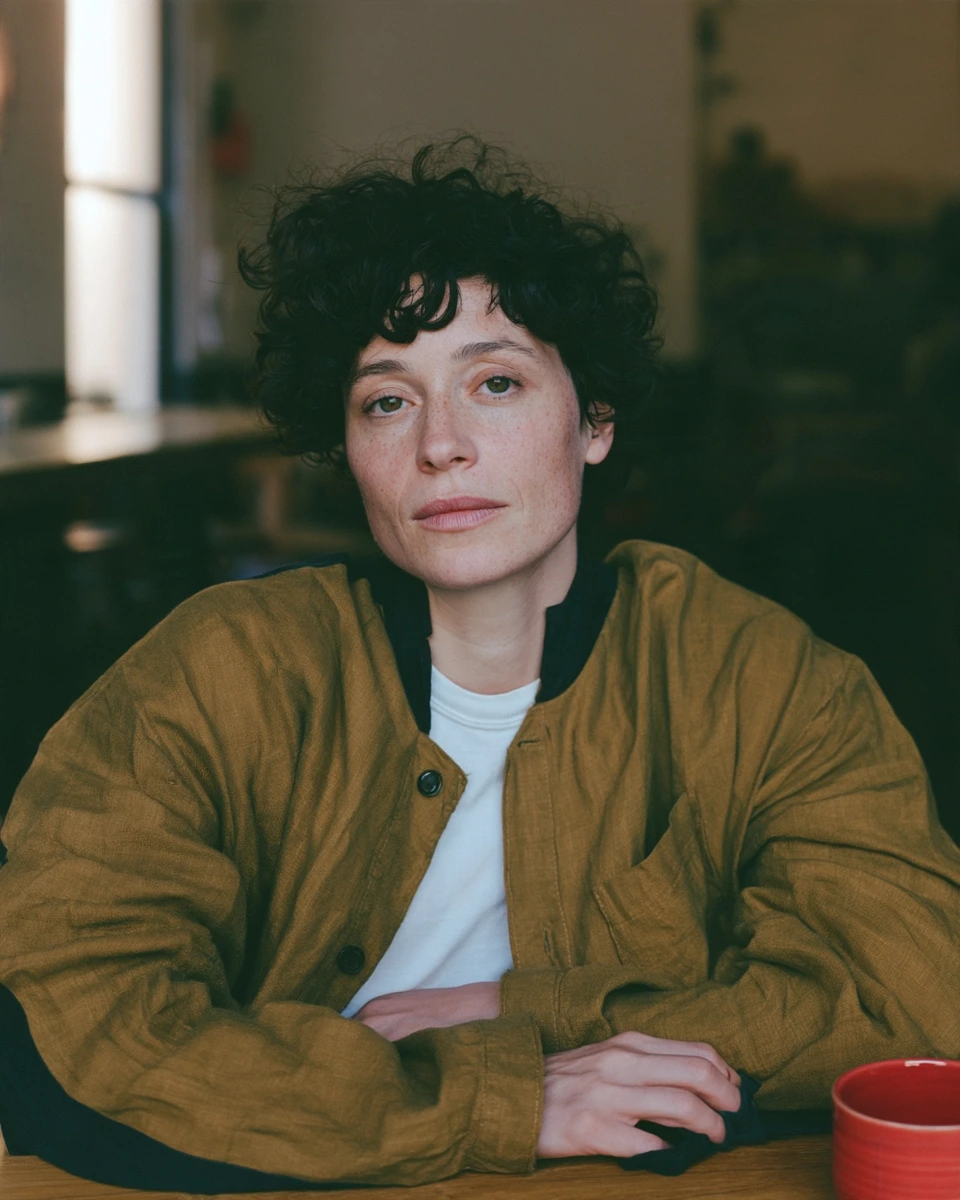
An ochre garment replaces the navy jacket. The fabric texture, buttons and collar shape change. The face’s overall appearance and the background remain similar.
Other details change too. In the original, the hands are hidden under crossed sleeves. After editing, one hand is clearly visible and another appears near the forearm. The exposed area of the white shirt is also reconstructed.
The result achieves the requested change of colour and garment, but the new hand arrangement needs attention. If the hand position matters to the project, try another edit or a more tightly defined clothing region.
How to remove an object from an image
The next file shows the portrait already wearing the ochre jacket. This instruction targets the red cup and the table surface:
Remove the red cup and its shadow. Continue the wooden tabletop with matching grain, perspective and lighting.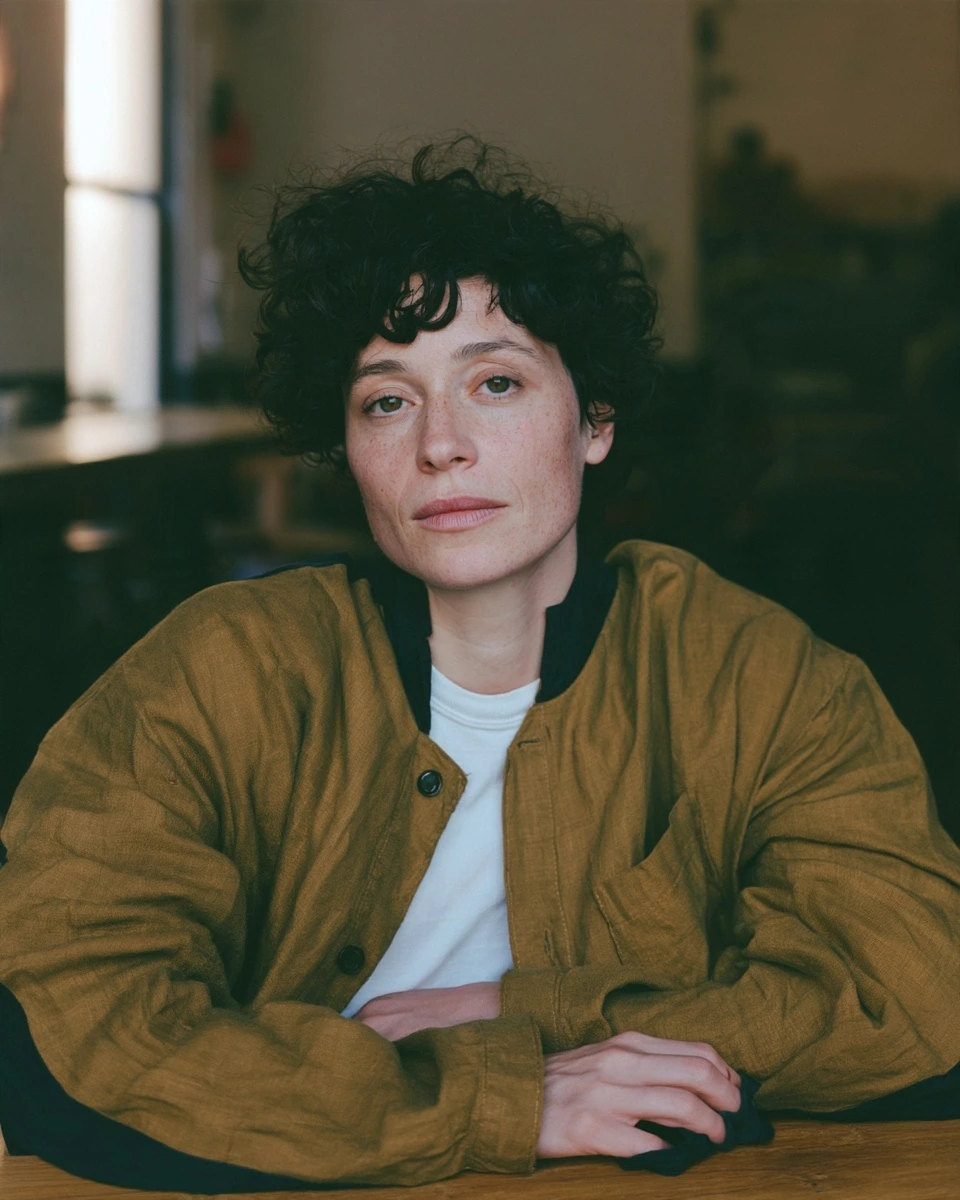
The cup disappears from the lower-right corner, replaced by a wooden tabletop. At this comparison size, no remaining part of the cup is visible. The portrait’s overall arrangement looks similar to the previous version.
Inspect your own result at a larger size as well. Check the wood grain, table edge and the area that previously held the shadow. A missing cup alone does not establish whether the reconstructed surface will work at a larger output size.
How to replace a background in Midjourney
The final version changes the setting. Its recorded prompt is:
change background to the coffee shop, reconstruct the hair to be the same as before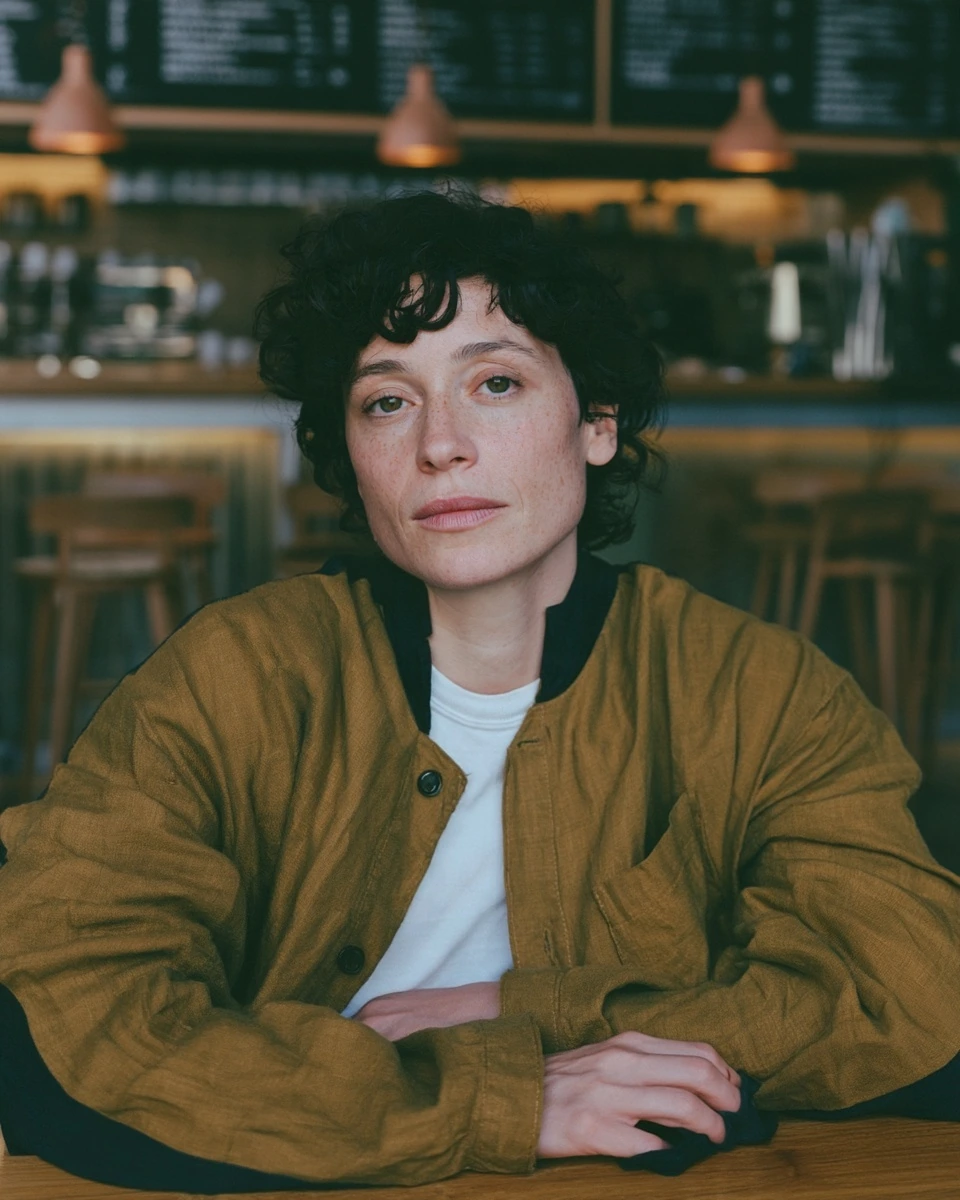
A different cafe interior appears behind the subject, with a counter, pendant lights and menu boards. The ochre jacket and the absence of the cup are also visible in this version.
Look closely at the hairstyle. The short, dark curls keep their overall character, but the hair’s outline and side strands differ, particularly on the right side of the frame. Asking to reconstruct the hairstyle did not preserve its exact silhouette.
Evaluate a background replacement along the subject’s edges too: hair, ears and shoulders. Check whether the setting matches the light on the face. In this comparison, the subject’s lighting looks broadly similar, while the interior changes substantially.
How to make your own edit
The Edit Model in V8.1 and V8.2 accepts images and written editing instructions. On the website, add a reference to “Attach to prompt” or use “Quick Edit” from an image in your gallery. The model supports up to four references. Edit Model documentation.
To target a specific region, open the Editor. Erase marks an area for regeneration; Restore brings back part of the original. Prepare the selection, enter your description and submit the edit. Editor documentation.
Start with one change. Save the original and the result separately. Before the next operation, decide whether to use the starting image or an edited version. Editing a previous result carries its new details forward too, such as the hand arrangement introduced by the jacket change.
What to check outside the edited area
| Edit | Visible result | Additional detail to inspect |
|---|---|---|
| Jacket | New colour, fabric and cut | Hands and white shirt |
| Cup removal | Tabletop replaces the cup | Wood grain and shadow remnants |
| Background | Different cafe interior | Hair outline and subject lighting |
For a portrait, begin by comparing the face, hands and silhouette. Then inspect the targeted area. This helps you notice anatomical changes while assessing the new clothing colour or background.
--raw reduces Midjourney’s default stylisation. It does not lock image details: it was enabled for the jacket edit that introduced the different hand arrangement. Raw mode documentation.
Questions about editing Midjourney images
Can I edit my own photograph?
Yes. The Editor on the Midjourney website accepts uploaded images. The comparisons above use a portrait generated in Midjourney. Editor instructions.
Is an instruction to keep everything else enough?
Check the result. In the clothing example, an instruction to keep the pose and white shirt accompanied changes to the hands and exposed shirt area.
Should every edit start from the original?
Using the original helps compare different approaches to the same correction. To combine accepted changes, work from your chosen result and check which details carry into the next version.
For working with one character across different scenes, see the consistent characters guide.